Automating the Roof
When I decided to build the observatory I had intended the roll off roof to be manually operated. However after inspiration from watching Glenn (AstroBloke) I decided to order a gate opener off Amazon as it was a complete kit I figured it as worth a try to and fit it.
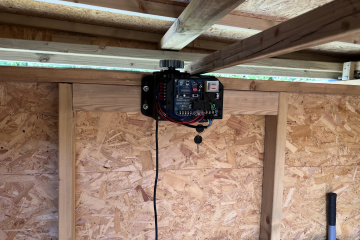
Bolting the main opener to the wall was relatively easy, I added additional timber re-enforcement along top of the wall to then bolted it in place with the support plate on the outside of the wall. (Inside before the cladding)
Next I added an extra length of timber that spanned the width of the observatory, with a little extra protruding outside so that the roof can be fully extended when open. Once that was lined up and holes cut out to make it fit, the next challenge was fitting the track.
The track was the hardest part of the roof build, having to cut one of the track pieces to fit, and getting them spaced correctly so the gear can move through all sections freely without jamming was a bit fiddly. I’ll admit I had to cut and drill this guide bar for a second time before making it work but got there in the end with lots of little adjustments.
With that all in place, next I needed to next fit the magnetic stoppers, so I positioned this in line with the rail on the edge of the wall, but had to extend the wire to reach back inside the opener where it was meant to be connected.
So now I was able to open and close the roof with the remotes but I wanted to go further and be able to control it from my phone, so I ordered a smart relay from Amazon, and with a little more guidance from Glenn, was able wire that in to control it from my phone.
Although I use Apple HomeKit everywhere, I opted to use one that didn’t support it in fear of the kids accidentally talking to Siri and inadvertently opening the roof in the rain.
Here you can see the roll off roof in action, I’m so glad I opted to do this.

